DATV - Portsdown, LimeSDR Mini & SDRangel
These are some notes about using the LimeSDR Mini (and perhaps the LimeSDR USB in a later update) for use as a TV transmitter Digital Amateur TeleVision or DATV. The first part is about setting up the LimeSDR Mini on a Raspberry Pi, then about configuring the RPi Portsdown software for transmission, and finally a sample result receiving on an Airspy Mini USB dongle using the SDRangel software under Windows.
Background
I bought a couple of LimeSDR devices (indeed, I was one of the original backers), but testing the devices in a Windows system had always produced errors on both devices, even when using a USB 3.0 hub. After posting this on Twitter, a couple of BATC (British Amateur Television Club) suggested I try the device in a Linux box, in particular one running the excellent Portsdown software. This is well-known and has active support (a requirement for most things these days - no instructions in the box!). This also interested me because I had used the Express DVB software on a Windows system to transmit DATV from an ADALM-Pluto SDR. For full information on the Portsdown please see the Portsdown DATV system Wiki.

Testing the LimeSDR Mini with the Portsdown software
The first step was to install the Portsdown software on the Raspberry Pi. As I happened to have a Pi 3B+ to hand (doesn't everyone have a spare Raspberry Pi card somewhere!) I used that. It has the same system software installed as recommended by the BATC. They also provide an install script to do everything you need to set up, but unfortunately the script expects the tools GIT and CMAKE to be already installed, but those appear to be missing from the Raspbian Stretch Lite download, and had to be installed manually. I got lots of help from Dave G8GKQ resuling in the following list of suggestions and my responses.
- When you log on by ssh, you should see a whiptail menu. Minimise that window and open a second
ssh window. That should come up with a command
prompt.
- Connect your LimeSDR Mini and do an lsusb to check that it is seen.
Response with the Lime Mini, I saw a new device:
Bus 001 Device 007: ID 0403:601f Future Technology Devices International, Ltd
With the LimeUSB:
Bus 001 Device 007: ID 1d50:6108 OpenMoko, Inc.
- Run LimeQuickTest (with that capitalisation) from the command line.
That should give you some info about the device and whether it passes the basic tests. It may fail due to firmware version mismatch.
Response with LimeSDR Mini:
Tests pass.
With LimeSDRUSB
LimeQuickTest
[ TESTING STARTED ]
->Start time: Mon Feb 11 14:34:49 2019
Gateware version mismatch!
Expected gateware version 2, revision 18
But found version 257, revision 0
Follow the FW and FPGA upgrade instructions:
http://wiki.myriadrf.org/Lime_Suite#Flashing_images
Or run update on the command line: LimeUtil --update
(Then lots of fails)
- Run LimeUtil --make That will tell you what firmware and gateware
version you have. The return should look something like this (but in a terminal):
https://wiki.batc.org.uk/images/0/08/Lime_after_update.jpg
Make device
Device name: LimeSDR-Mini
Expansion name: UNSUPPORTED
Firmware version: 5
Hardware version: 1
Protocol version: 1
Gateware version: 1
Gateware revision: 27
Gateware target: LimeSDR-Mini
Serial number: 0x1d394122d0e9d0
Free connection... OK
- To upgrade the software you can run LimeUtil --update After that
check with LimeUtil --make that the version info is exactly as the image.
Hardware version will probably be 1 not 2.
- If you need to downgrade you can run LimeUtil --force --update
- If all is well, you can go to back to the whiptail menu and select option 2, configure output and then Option 3 Output Mode. Use the arrow
keays to move the cursor down to Lime Mini, press the space bar to select it
and then press enter.
- If you simply press enter from the main screen, the LimeSDR should transmit on the selected frequency with the all the selected settings.
There are still some issues with using the Portsdown software from an SSH
session, but the team are currently working on these.
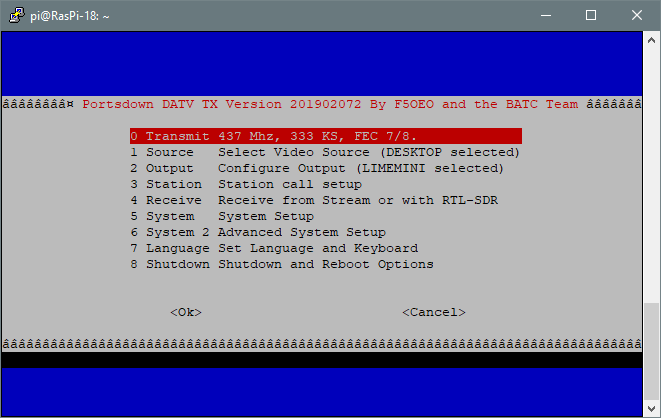
Configuring the Portsdown software for transmission
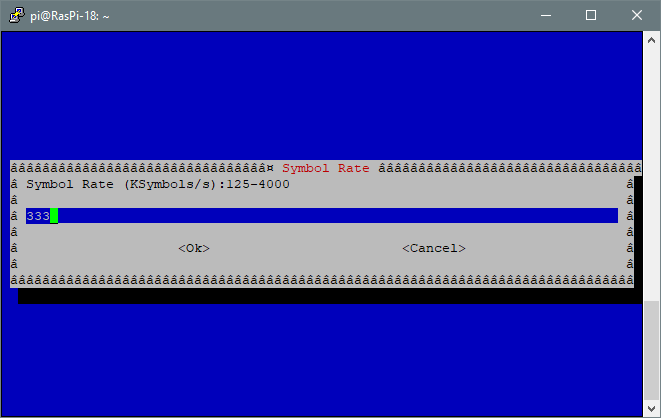
Pressing the spacebar in the opening whiptail menu turns the Raspberry Pi to a TV transmitter on 437.0 MHz, using a 333 ksps 7/8 QPSK signal. This using rapid toggling of one of the RPi GPIO pins, so putting a receiver near to the RPi you should hear something. If you've already stepped ahead and configured the SDRangel software.
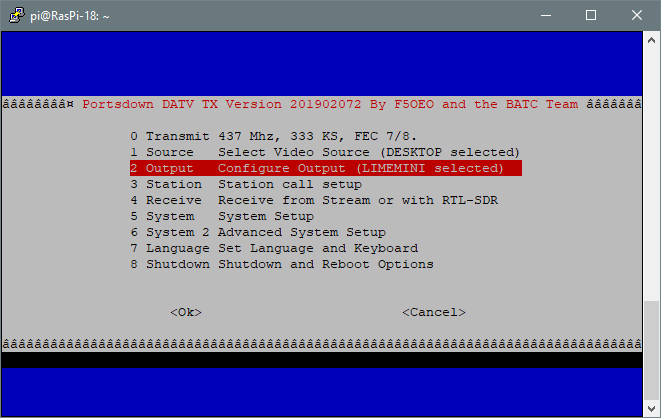
We need to tell the RPI that it should send its output to the LimeSDR Mini, so use the cursor keys to move down to option 2 and press Enter.
There's no need to alter most of the parameters, but here's the symbol rate setting:
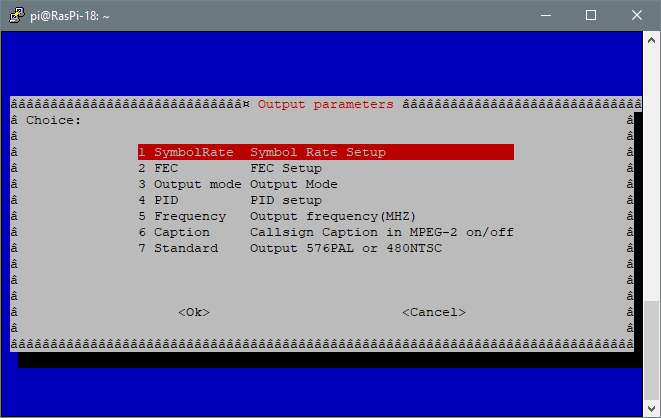
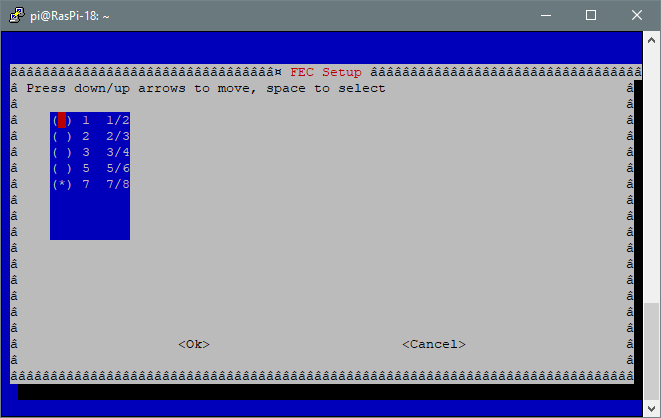
.. and the Forward Error Correction:
Here's the important one! Cursor key down to the LIMEMINI option, press spacebar, then tab to the OK box and press Enter.

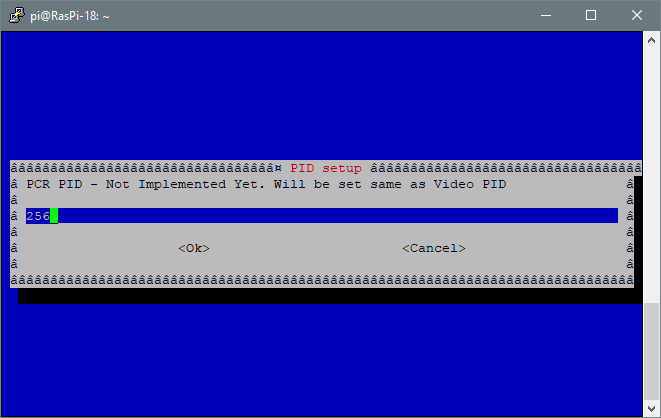
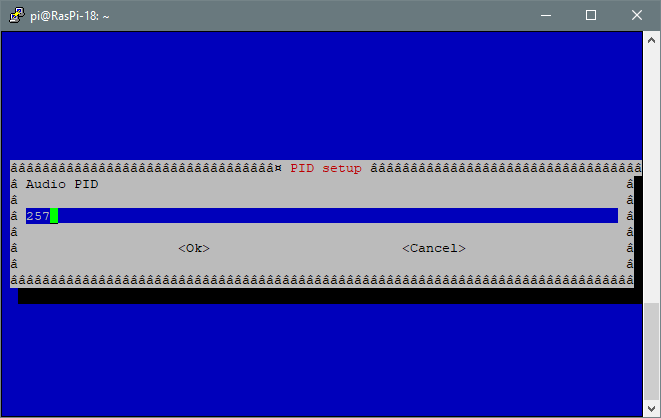
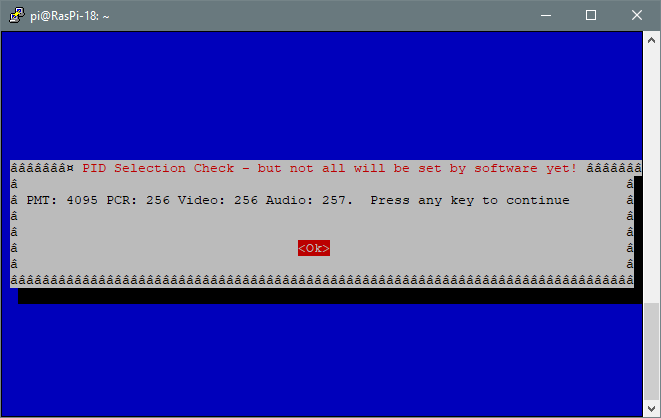
Next come the packet identifiers. Just tab, OK through these.


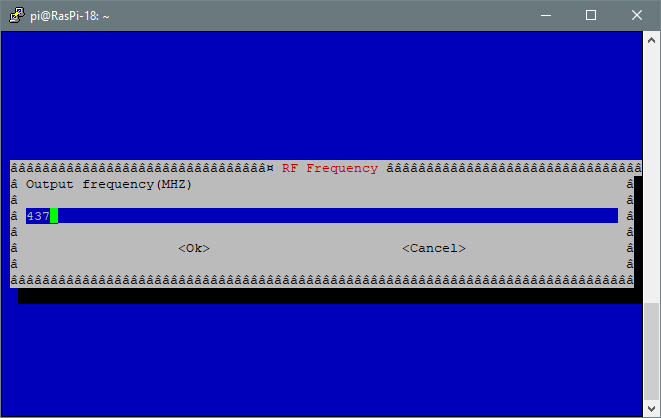
Now we choose the transmission frequency. Note that you need an Amateur Radio licence to transmit, and please keep within the allocated frequency band and sub-bands for amateur television.
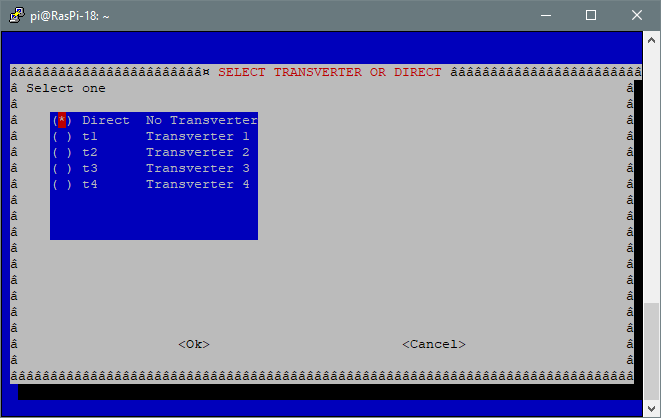
The Trasnsverter option is folk who may be changing the output frequency of the RPi with external kit.
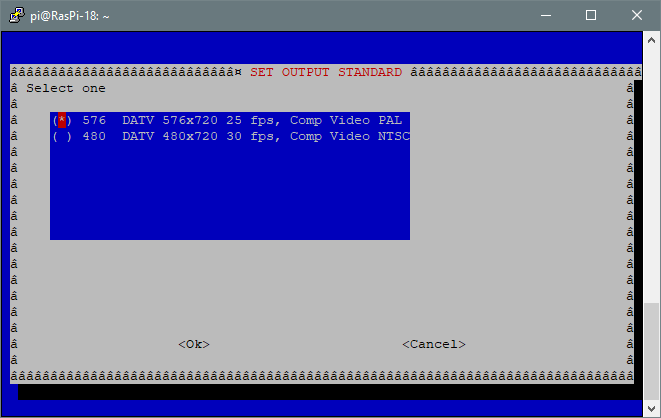
Both US and UK TV standards are provided. I expect the options may change when you use a video source other than the built-in testcard.
On returning to the home menu, press Enter with option 0 selected.
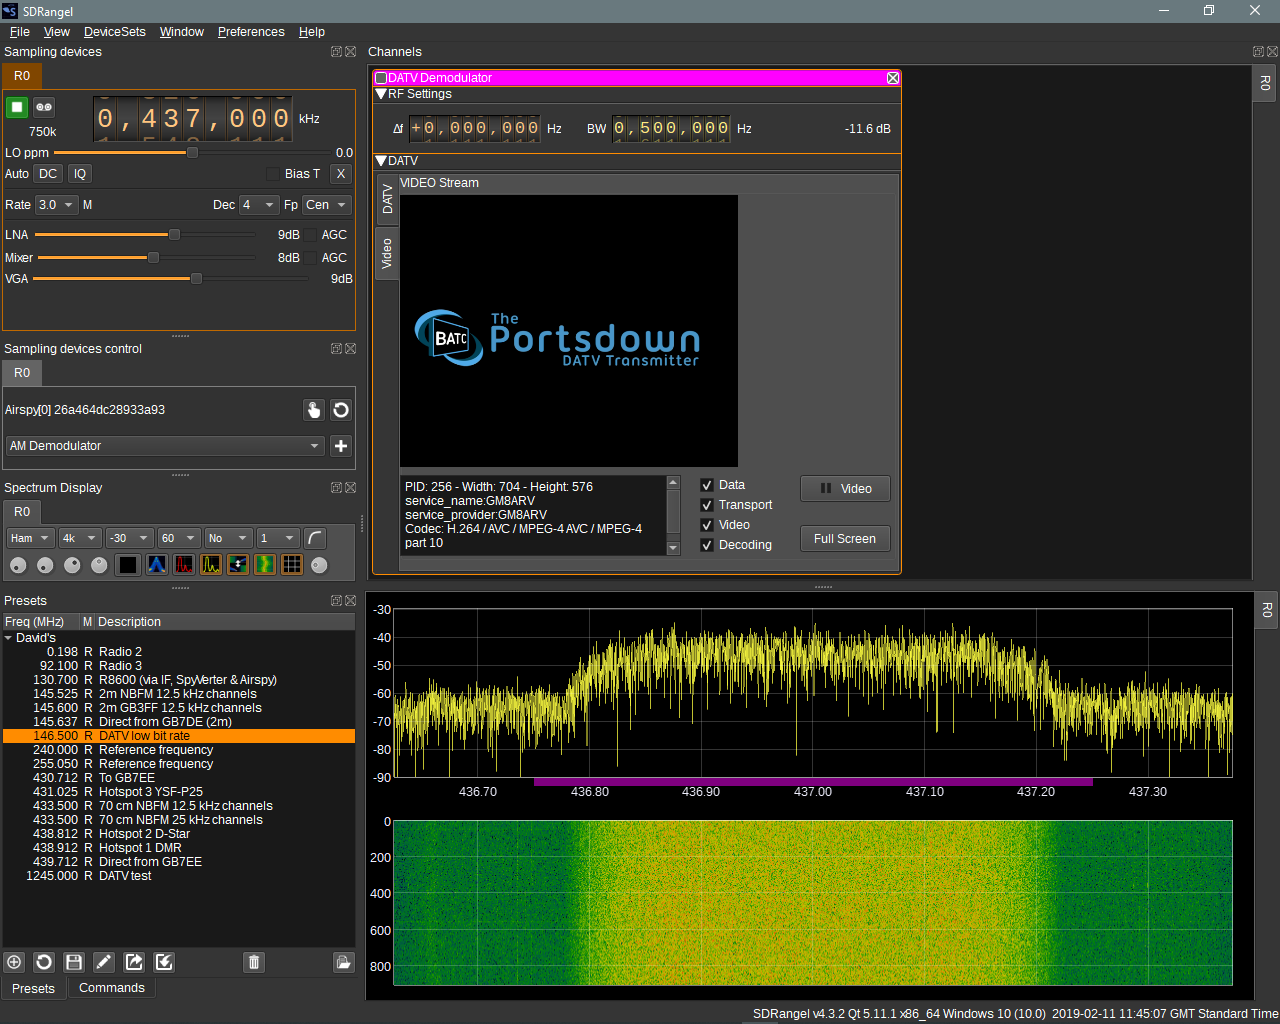
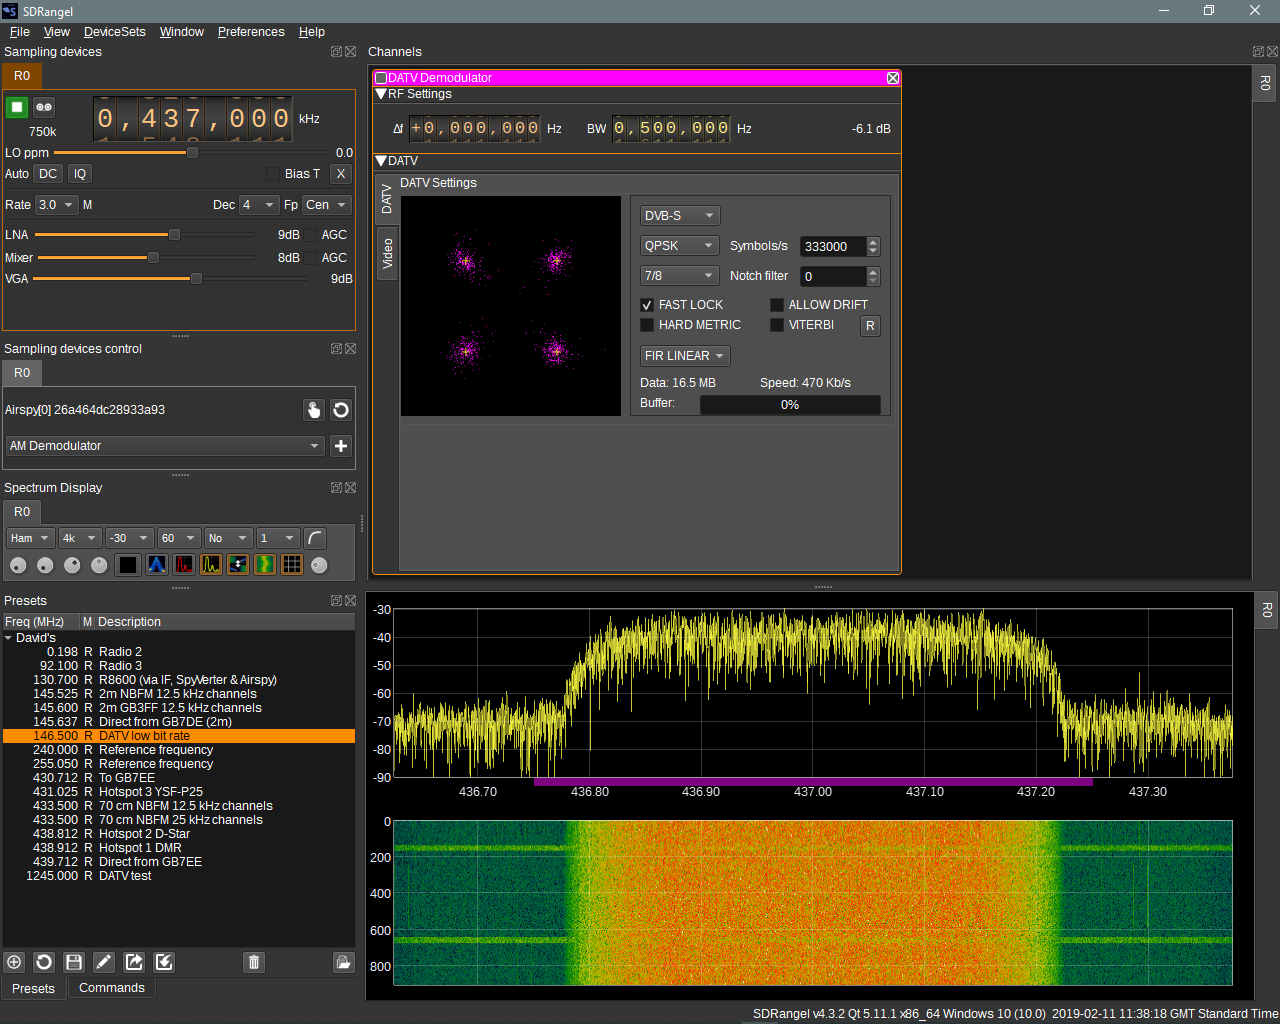
Using the SDRangel software
These are the settings I used with the Airspy Mini. You adjust the gains to get a good signal-to-noise ration without overloading the receiver or subsequent processing. Add a DATV plugin from the drop-down list, select the DATV tab on the left of the DATV settings, and select:
- DVB-S
- QPSK ar 333000 symbols/second
- 7/8 FEC
I suggest playing with the other settings to get the best constellation diagram (the four fuzzy purple dots) you can - i.e. make the dots the least fuzzy. When you start to see the buffer filling up you know there is video accumulating, waiting to be displayed, so ....
... you can now switch to the Video tab and display your image!